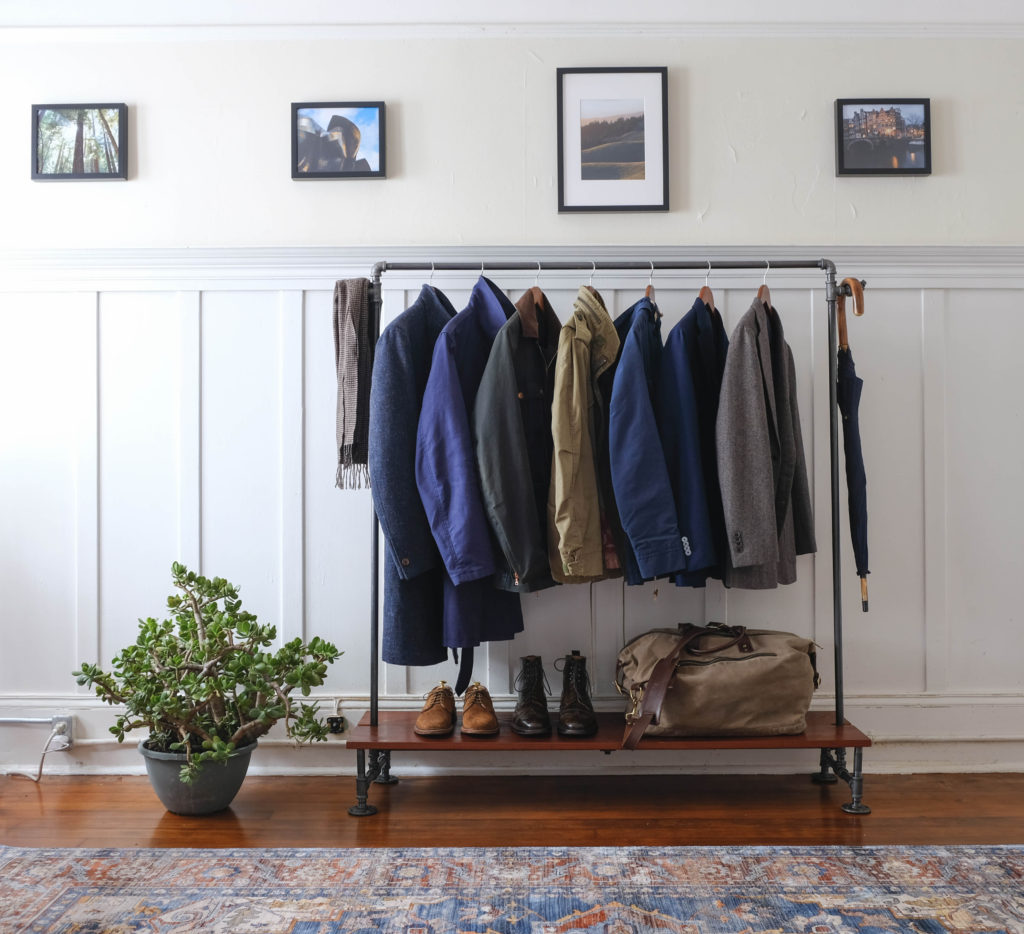
San Francisco has a lot of things to offer, but closet space isn’t one of them. My apartment from 1912 has some lovely period details but very little storage space, so after grumbling about it for 6 years I decided to take matters in to my own hands. It’s been a while since I put my engineering background to use, but a bit of planning and a few hours of work resulted in my newest piece of furniture. Read on to see how to make a coat rack for your own home (dope outerwear not included).
I’ll start by saying that this design is a nearly one-for-one replica of the one made by Ryan Plett, who ran the blog You Have Broken the Internet back in the peak of the menswear era. The blog is no longer around, so I figured I would discuss this project here so that those interested in doing something similar can attempt it easily. You can see a picture of his creation here.
The majority of the rack is made of black pluming pipe that goes by the uncomfortable name of black nipple. These pipes come in an enormous amount of sizes and lengths, and tons of fittings are made for all sorts of shapes. No pipe cutting or threading is necessary if you get the right pieces, which should be easy to do. For the wood, you will need some sort of saw and drill at the very least.
1. Coat Rack Supplies
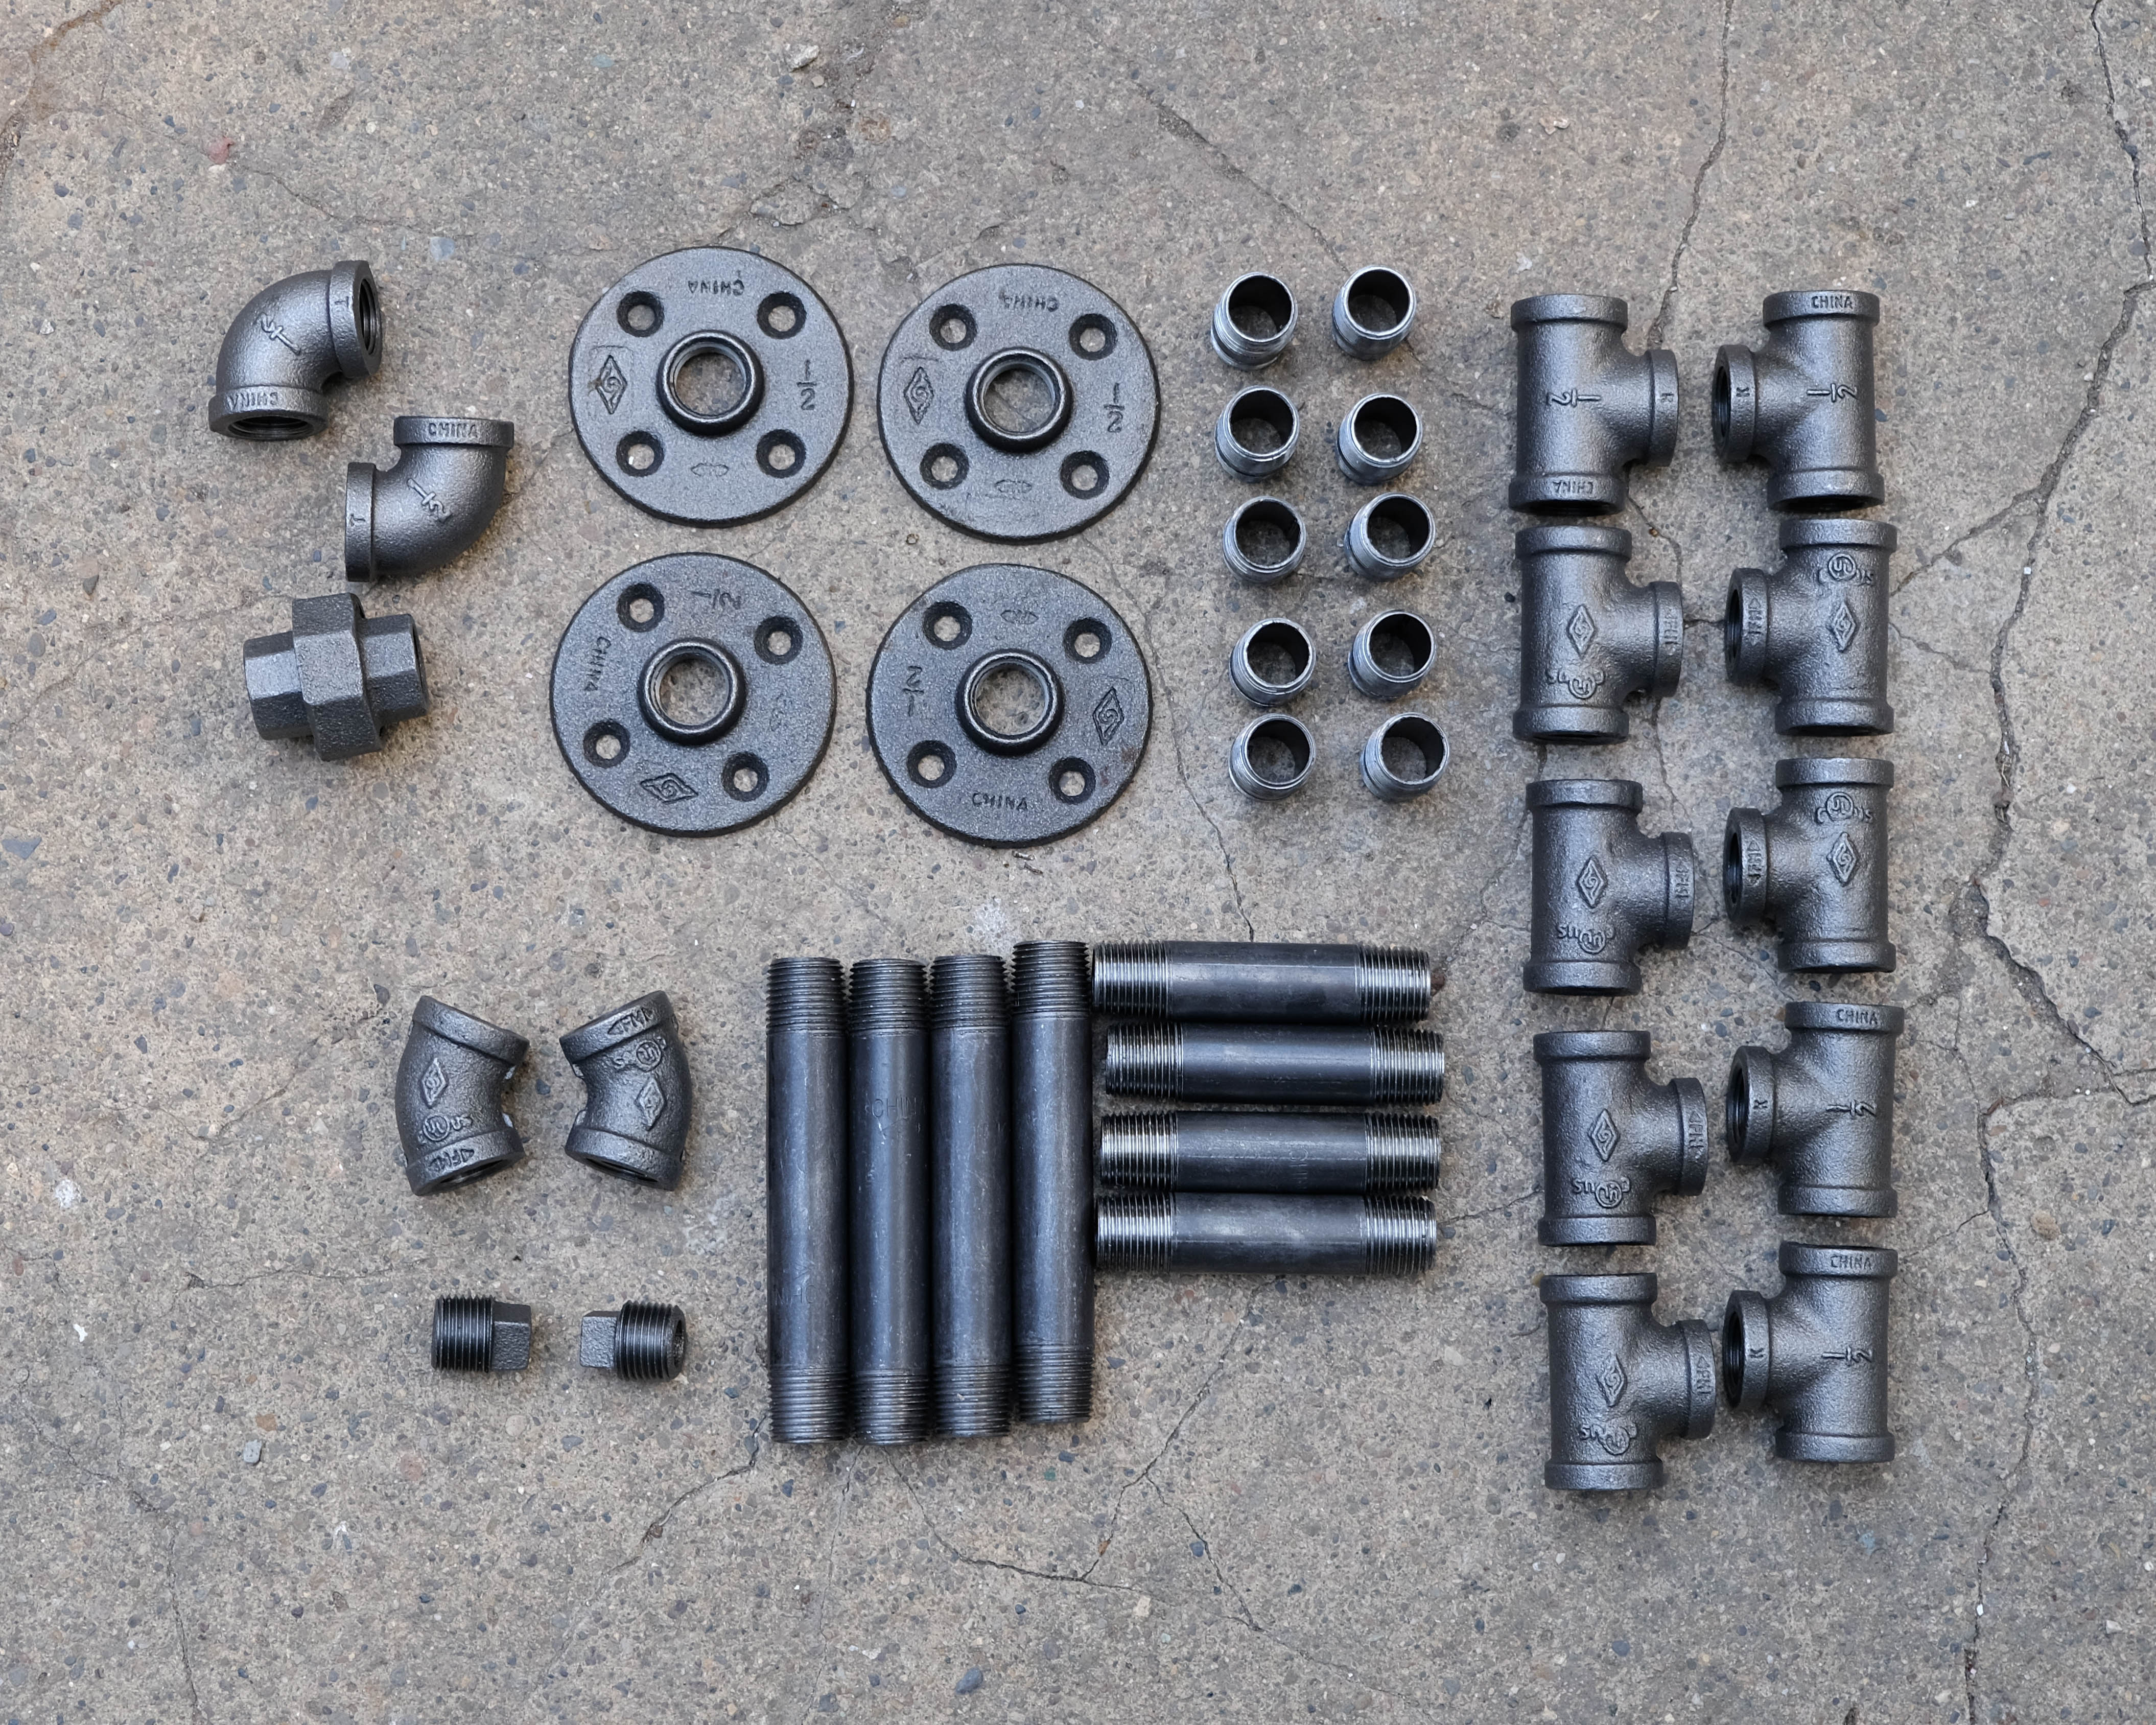
Here’s what you’ll need to complete this project. Note that you can easily change the overall dimensions of the coat rack by getting different dimensions for the long-spanning parts. The central part of mine is ~4’x4′, but you can change this as much as you want (Ryan’s is ~3’x4′). Any aspect of this project is easily customizable, but the list below will get you a finished project that looks like the photo above.
Black nipple pipe:
- (3) 48″x1/2″ pipe
- (2) 24×1/2″ pipe
- (4) 5″x1/2″ pipe
- (4) 3″x1/2″ pipe
- (10) 1-1/2″x1/2″ pipe
Fittings:
- (10) 1/2″ T
- (2) 1/2″ 90° elbows
- (2) 1/2″ 45° elbows
- (2) 1/2″ plugs
- (4) 1/2″ floor flanges
- (1) 1/2″ union
TOTAL: 44 pieces. I paid about $90 shipped from SupplyHouse.com, although these should also be readily available at your local hardware store.
Wood: There’s a lot of flexibility for this piece. Essentially, it needs to be long enough and wide enough to span across the whole bottom. For me, that meant the wood had to be around 15
” x 54″. Multiple boards can be joined together if you want to get something narrower (like two 8″ boards). Also, keep in mind that the board(s) will need to be thick enough to span across the length of the rack and support the weight of whatever you put on it without bending much. Fortunately, I have two degrees in structural engineering so I can tell you that about 1/2″ or more should be fine. I was lucky enough to find some redwood boards from 1964 in my uncle’s garage, but a simple piece of pine or similar will be fine. Feel free to find some old boards to reuse, though, as a bit of age will look good with the industrial vibe of the pipe frame.
2. Constructing the Frame
Putting together the pipe section is pretty self-explanatory – if you did your shopping right, everything should fit together well right out of the box. No tools are required. A few important notes, though:
- The threads on the pipes can be sharp, so be careful and/or wear some gloves.
- Black nipple usually comes with a film of black grease all over it. It’s probably easiest to get this off before you assemble the thing, but I did most of the grease removal after I put it together because I was impatient. Either way, it will take some elbow grease to remove this…regular grease. You’ll also want to put it together in a place where you can get messy.
- The two 24″ pieces go along the bottom and are connected in the middle with the union. This is because without it, tightening one end will loosen the other end. Just trust me on this.
- Because so many parts have to be pointed a certain way, it can be tricky to get everything screwed tight. It will take a bit of trial and error to get everything solid and also with the correct orientation.
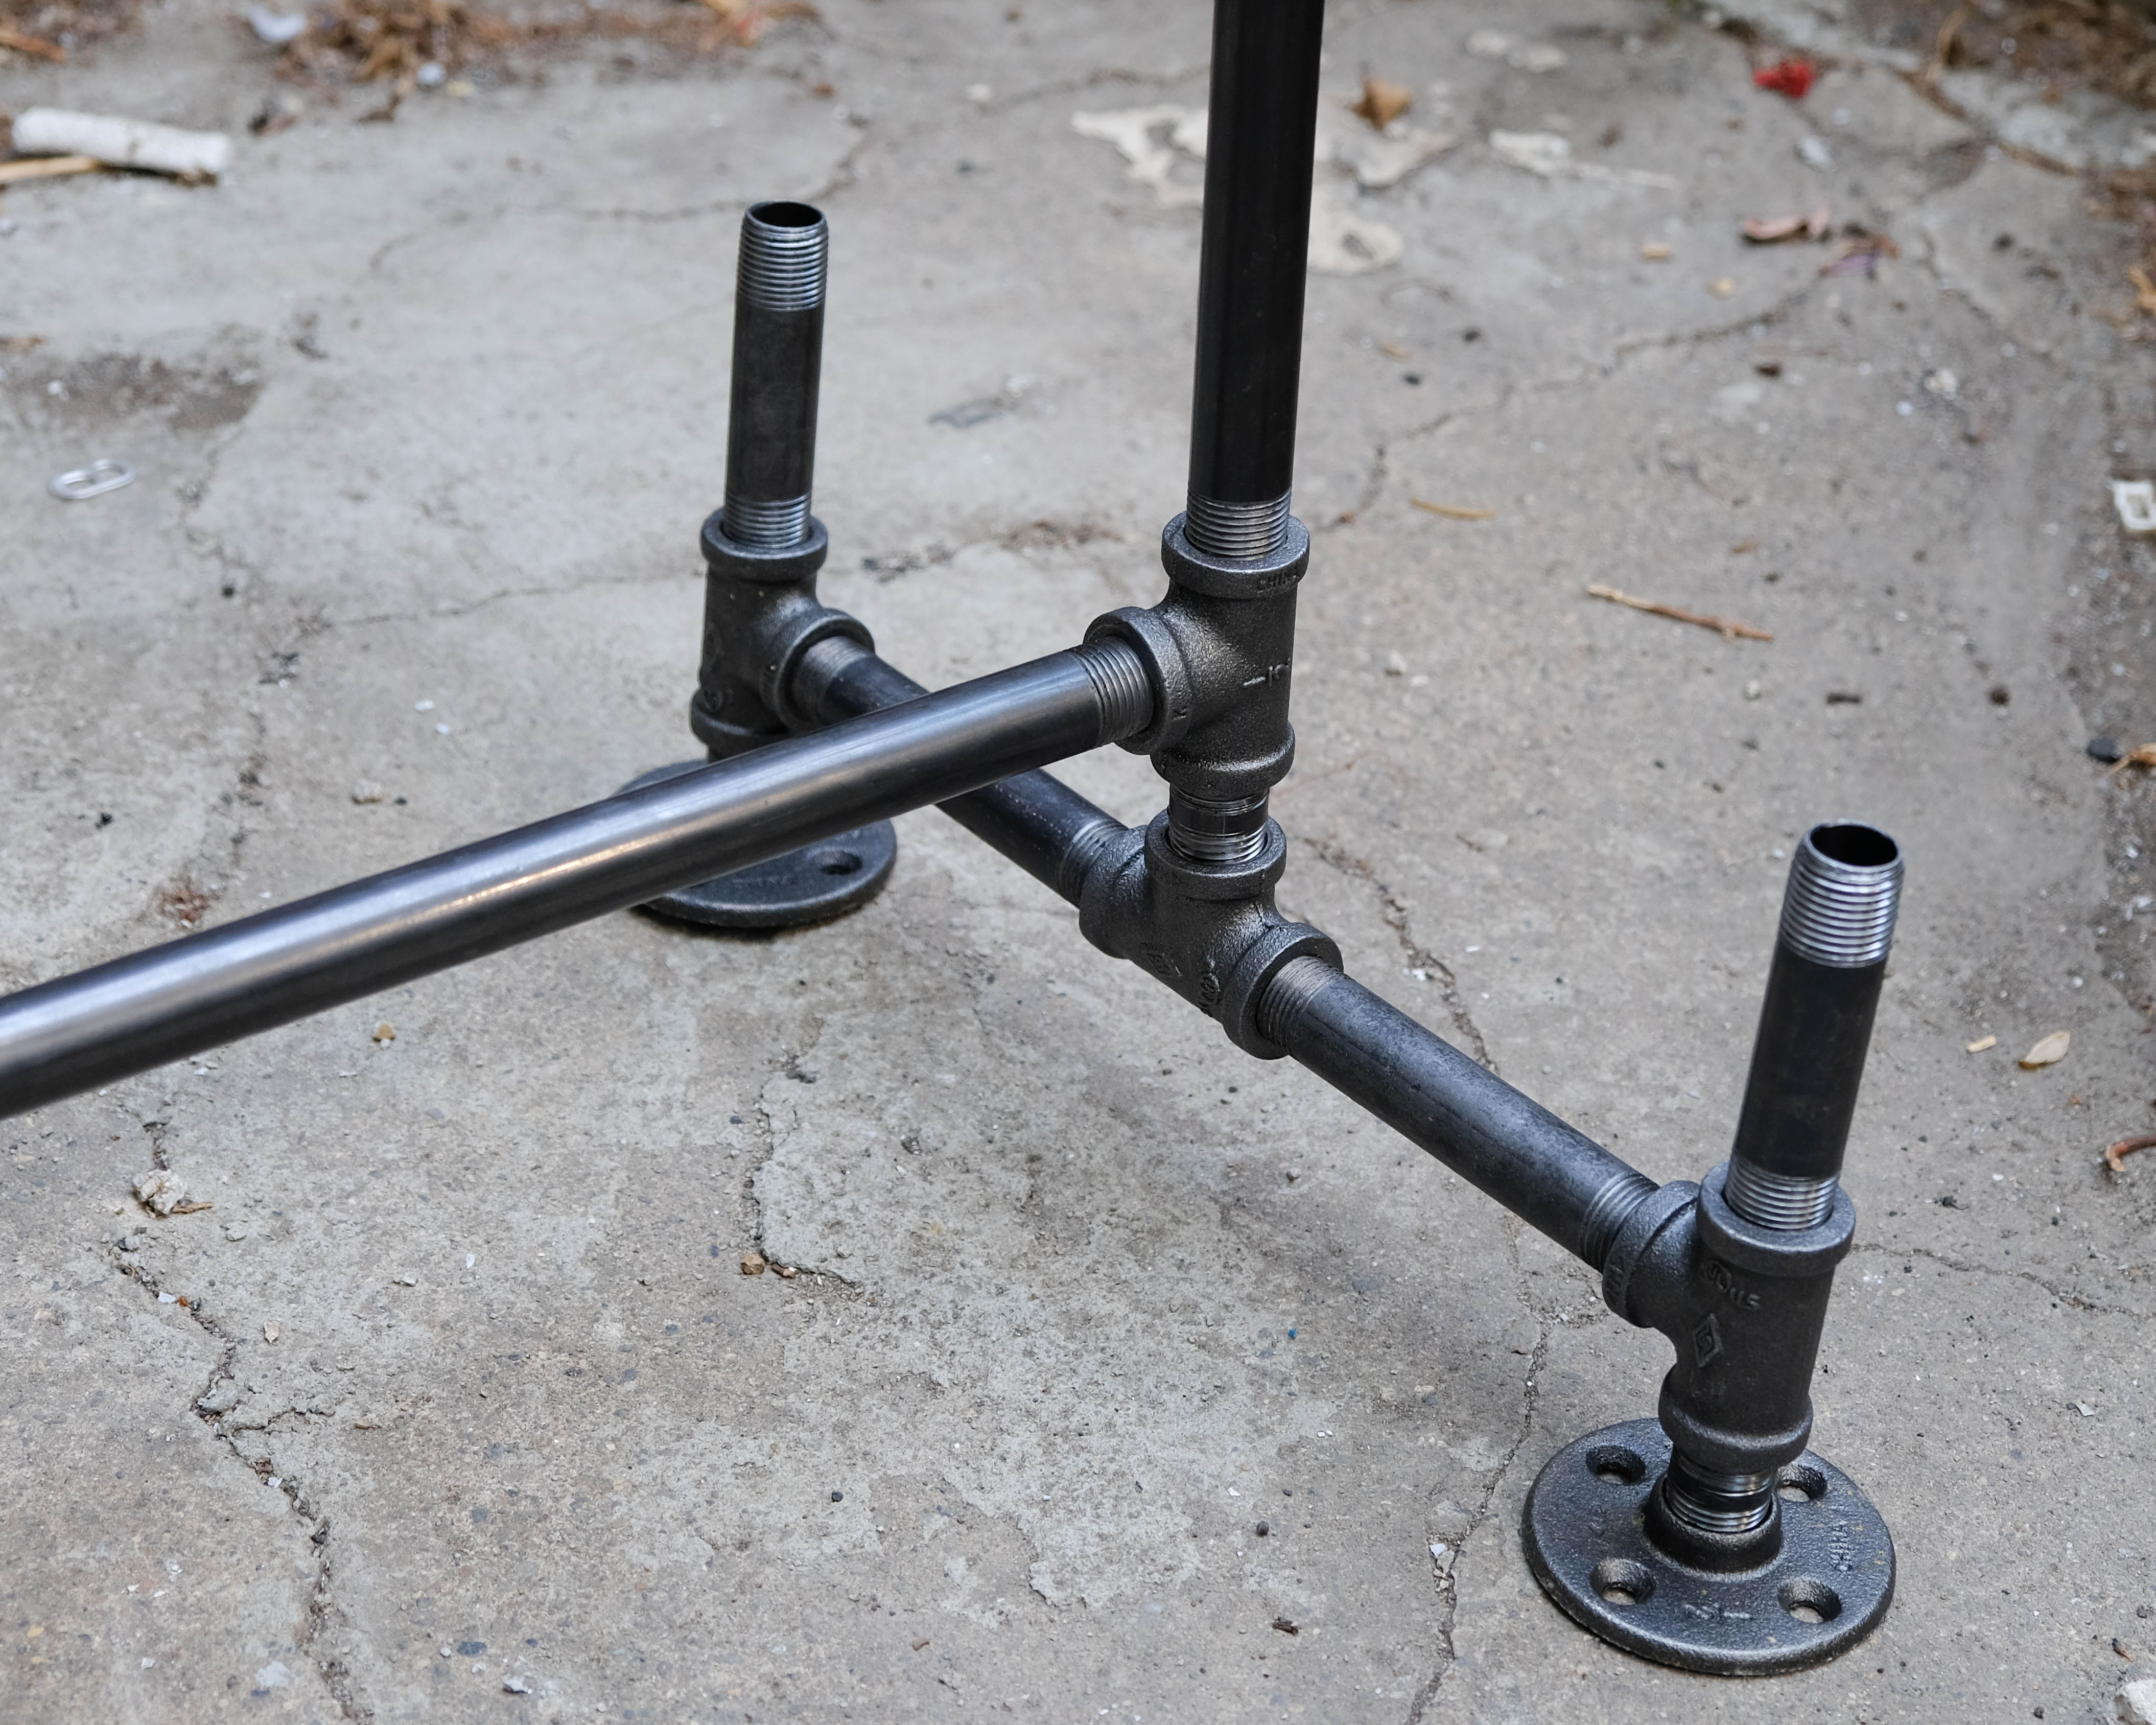
One side of the completed base. The 3″ pieces are above the feet, the 5″ pieces span outward from the center, and the little 1-1/2″ pieces are used wherever two fittings are close to each other (like between the feet and T sections). All of these lengths can be customized if you’d like yours to be a different size.
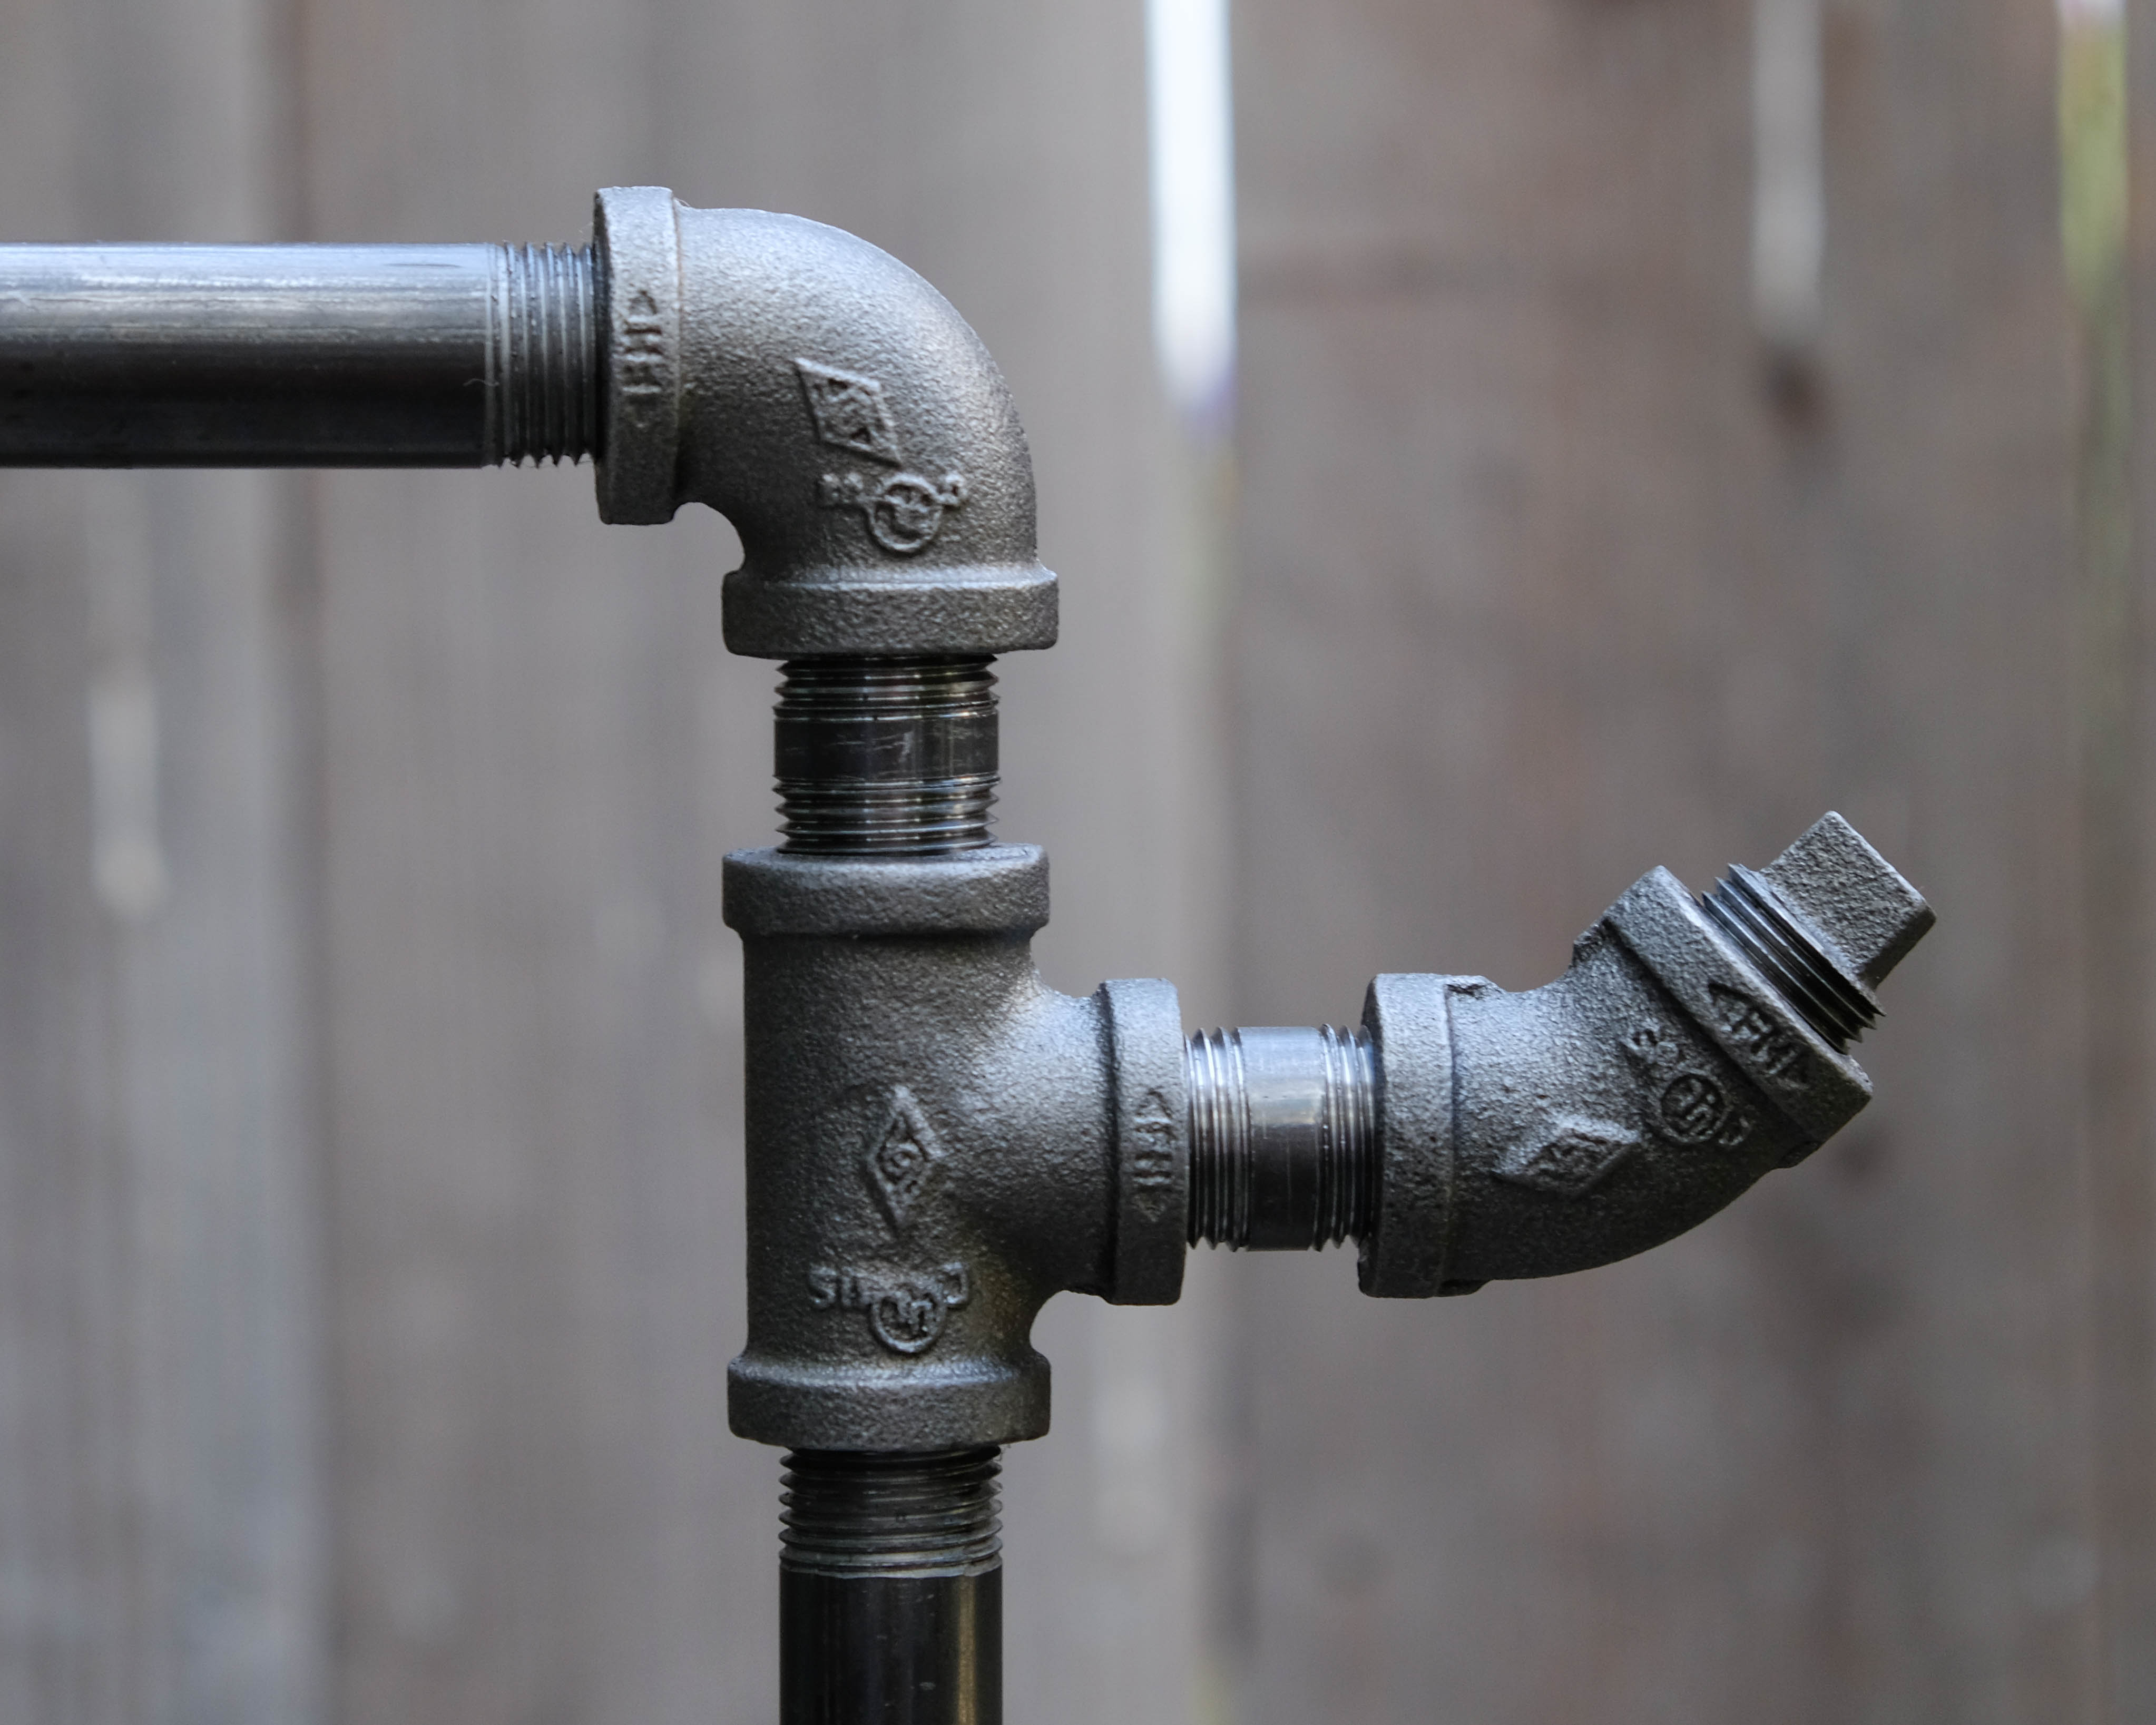
The hangers I added on the outside of the rack. These can be easily omitted if you want yours to be smaller or cheaper – just screw the vertical pipes directly into the 90 degree elbow.
3. Building the Wood Platform
The wood base is a bit more complex. If you don’t have much in the way of woodworking equipment (I sure don’t), you’ll need to find someone that does. Fortunately, my aunt and uncle live nearby and have a pro-grade DIY zone in their garage. You won’t need that much equipment, though – just something to cut the wood to size and to drill the holes. The saving grace with the wood part is that the tolerances aren’t that tight – this isn’t an iphone.
As I mentioned earlier, I cut my board to a final dimension of 54″ x 15″. This was enough to extend to the edge of the floor flanges but no further. Once you have your board the right size, you’ll need to cut out the holes for the vertical pipes (and make sure that you have the right amount of space between the holes!). I also cut out the sides of the holes so that the board could easily be added or removed (see below).
An important note is that these pipes do not actually measure 1/2″ in any way, despite their name (much like how a 2×4 is nowhere near 2″ x 4″). Somewhat conveniently, though, the 1/2″ pipe has an outside diameter of 0.84″ – this means that you can use a 7/8″ (0.875″) spade bit to drill the hole. It will fit nice and close while still having enough room to move smoothly.
After the board is cut to size and shaped for the pipes, it’s pretty much ready if you want to stop there. With that said, I like to do a bit of sanding and finishing, both for aesthetic and functional reasons. The sanding will help keep the raw ends from chipping or splintering, and giving the wood a coat or two of oil (or varnish) will keep it protected. After sanding I gave this board two coats of natural Watco Danish oil, and after about a day it was dry and ready to go. I highly encourage you to sand and oil, because both steps are immensely satisfying work (in my opinion). Check out the transformation below:
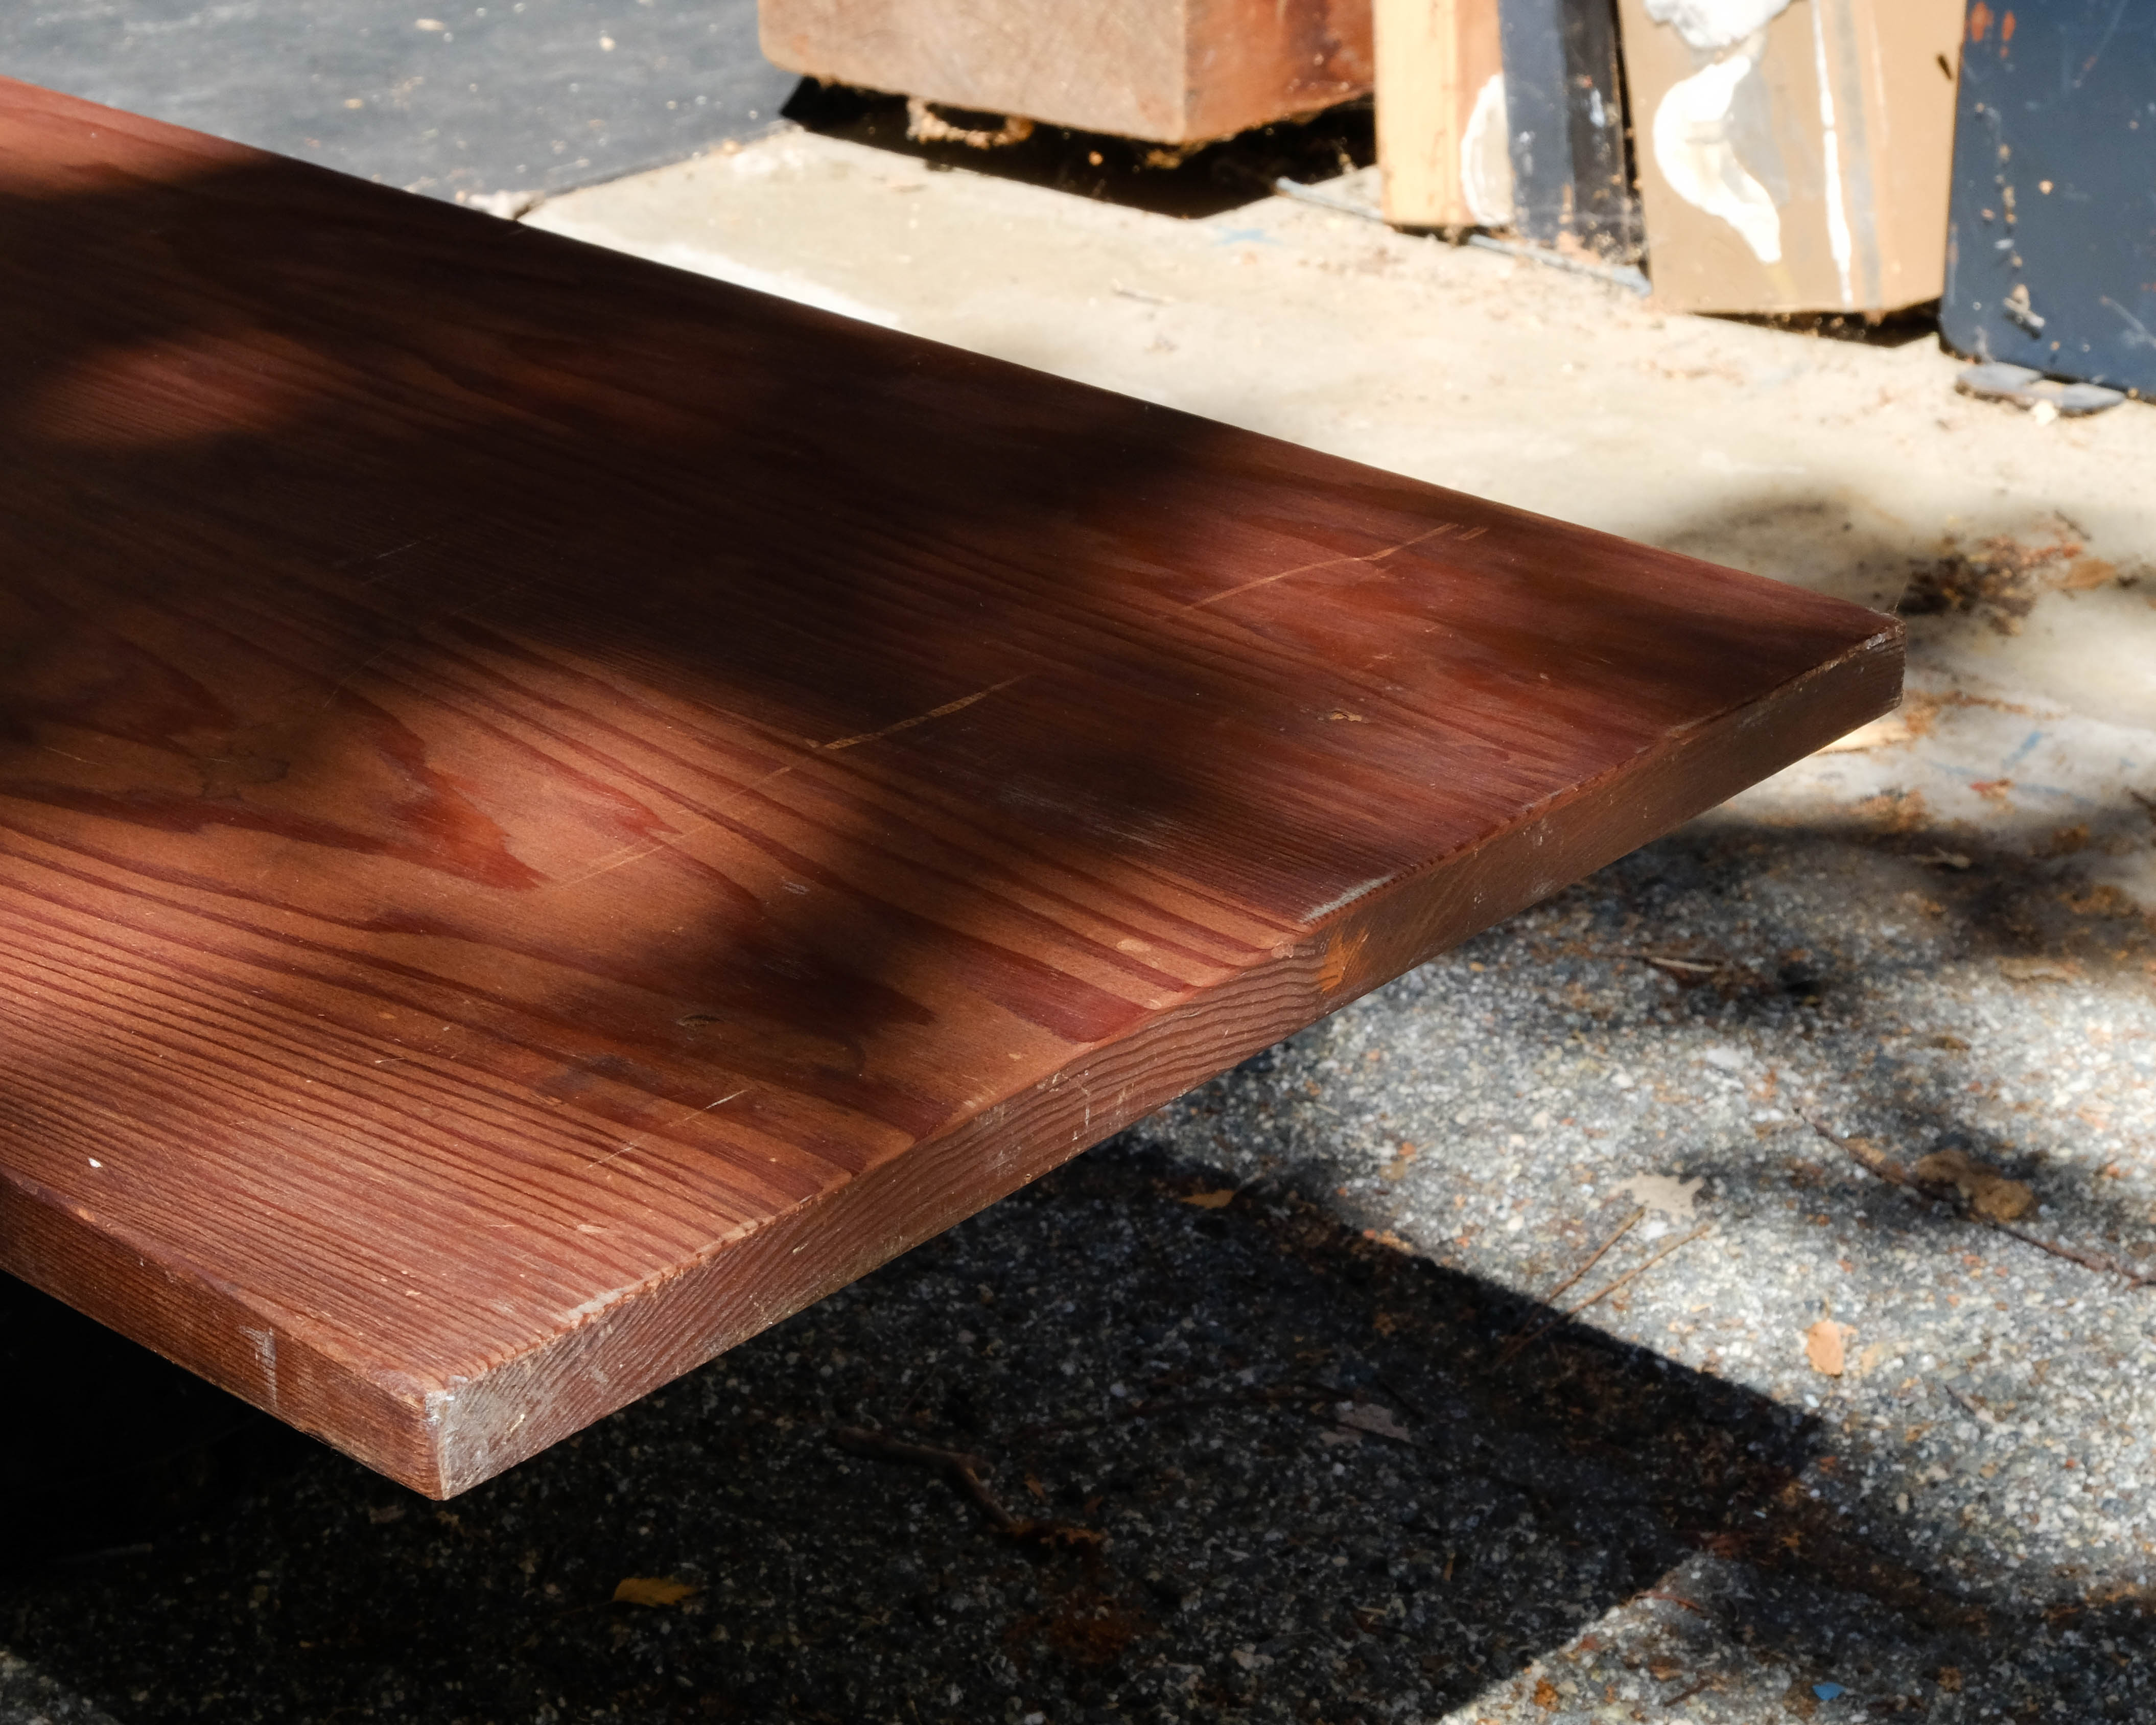
The redwood board after 54 years in a basement (it’s two 8″ boards joined together). My uncle originally used it for a bookshelf in his first apartment.
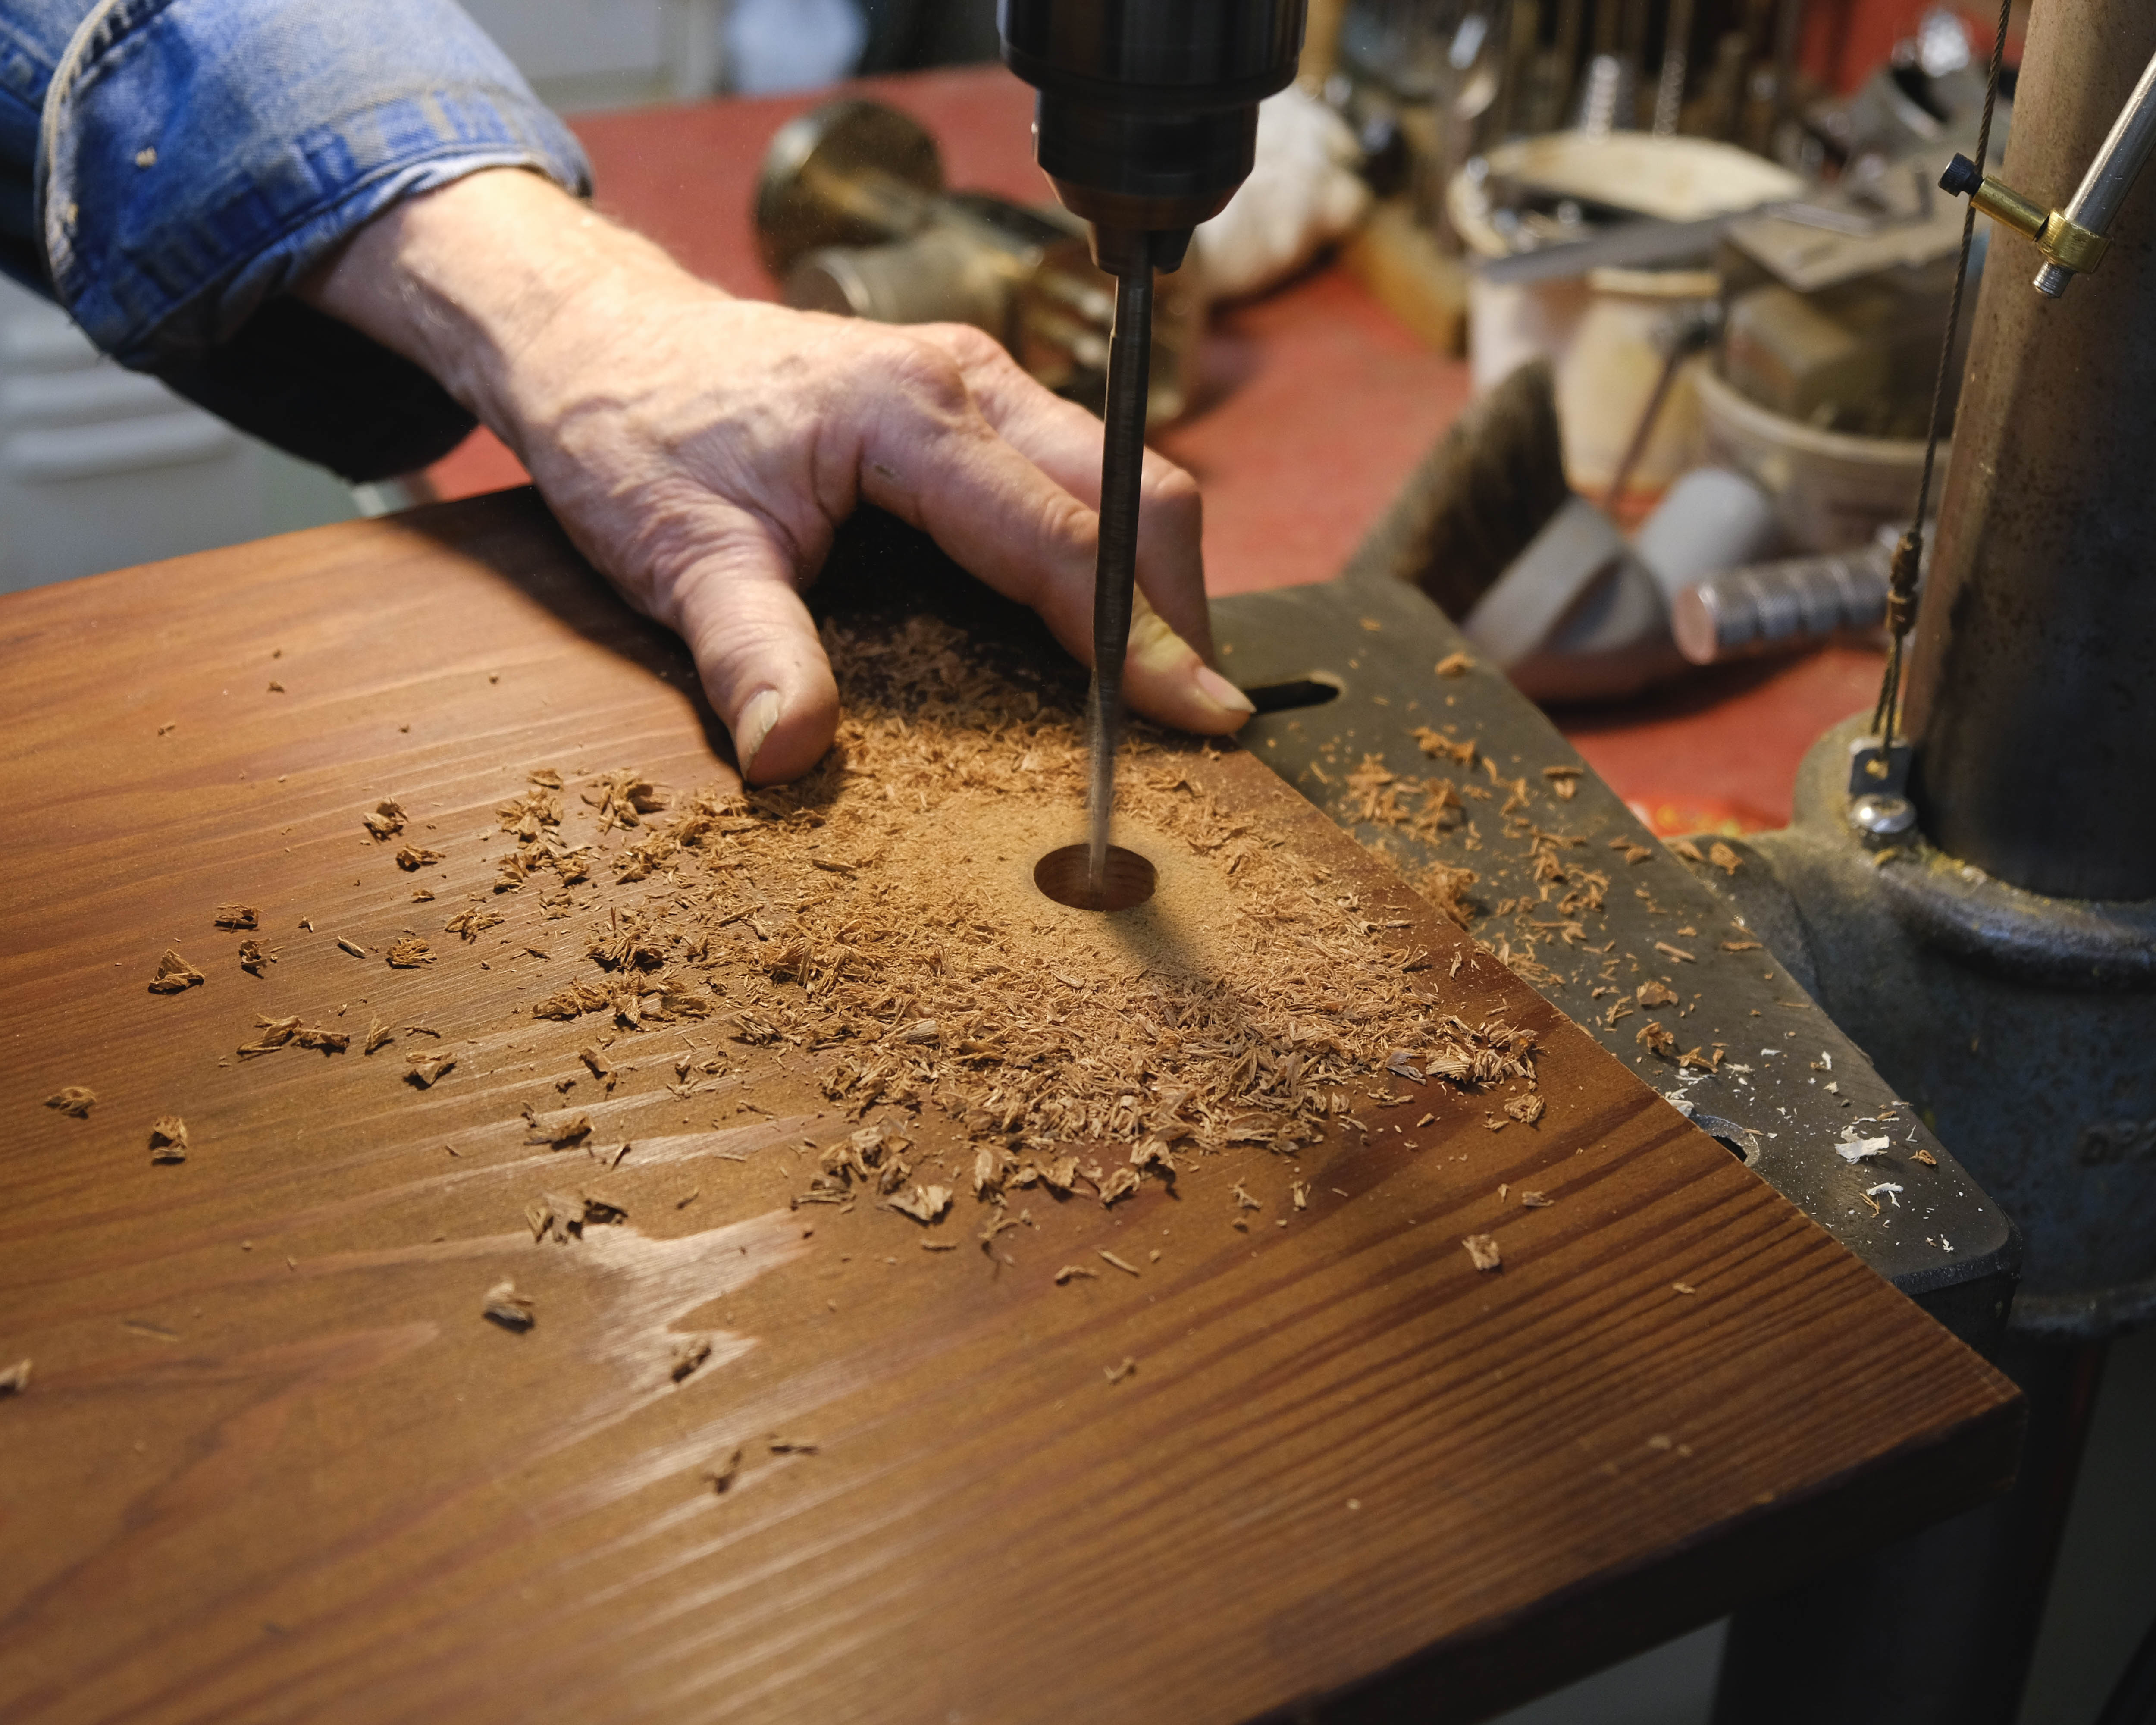
Drilling the 7/8″ holes with a drill press after cutting the board to size.
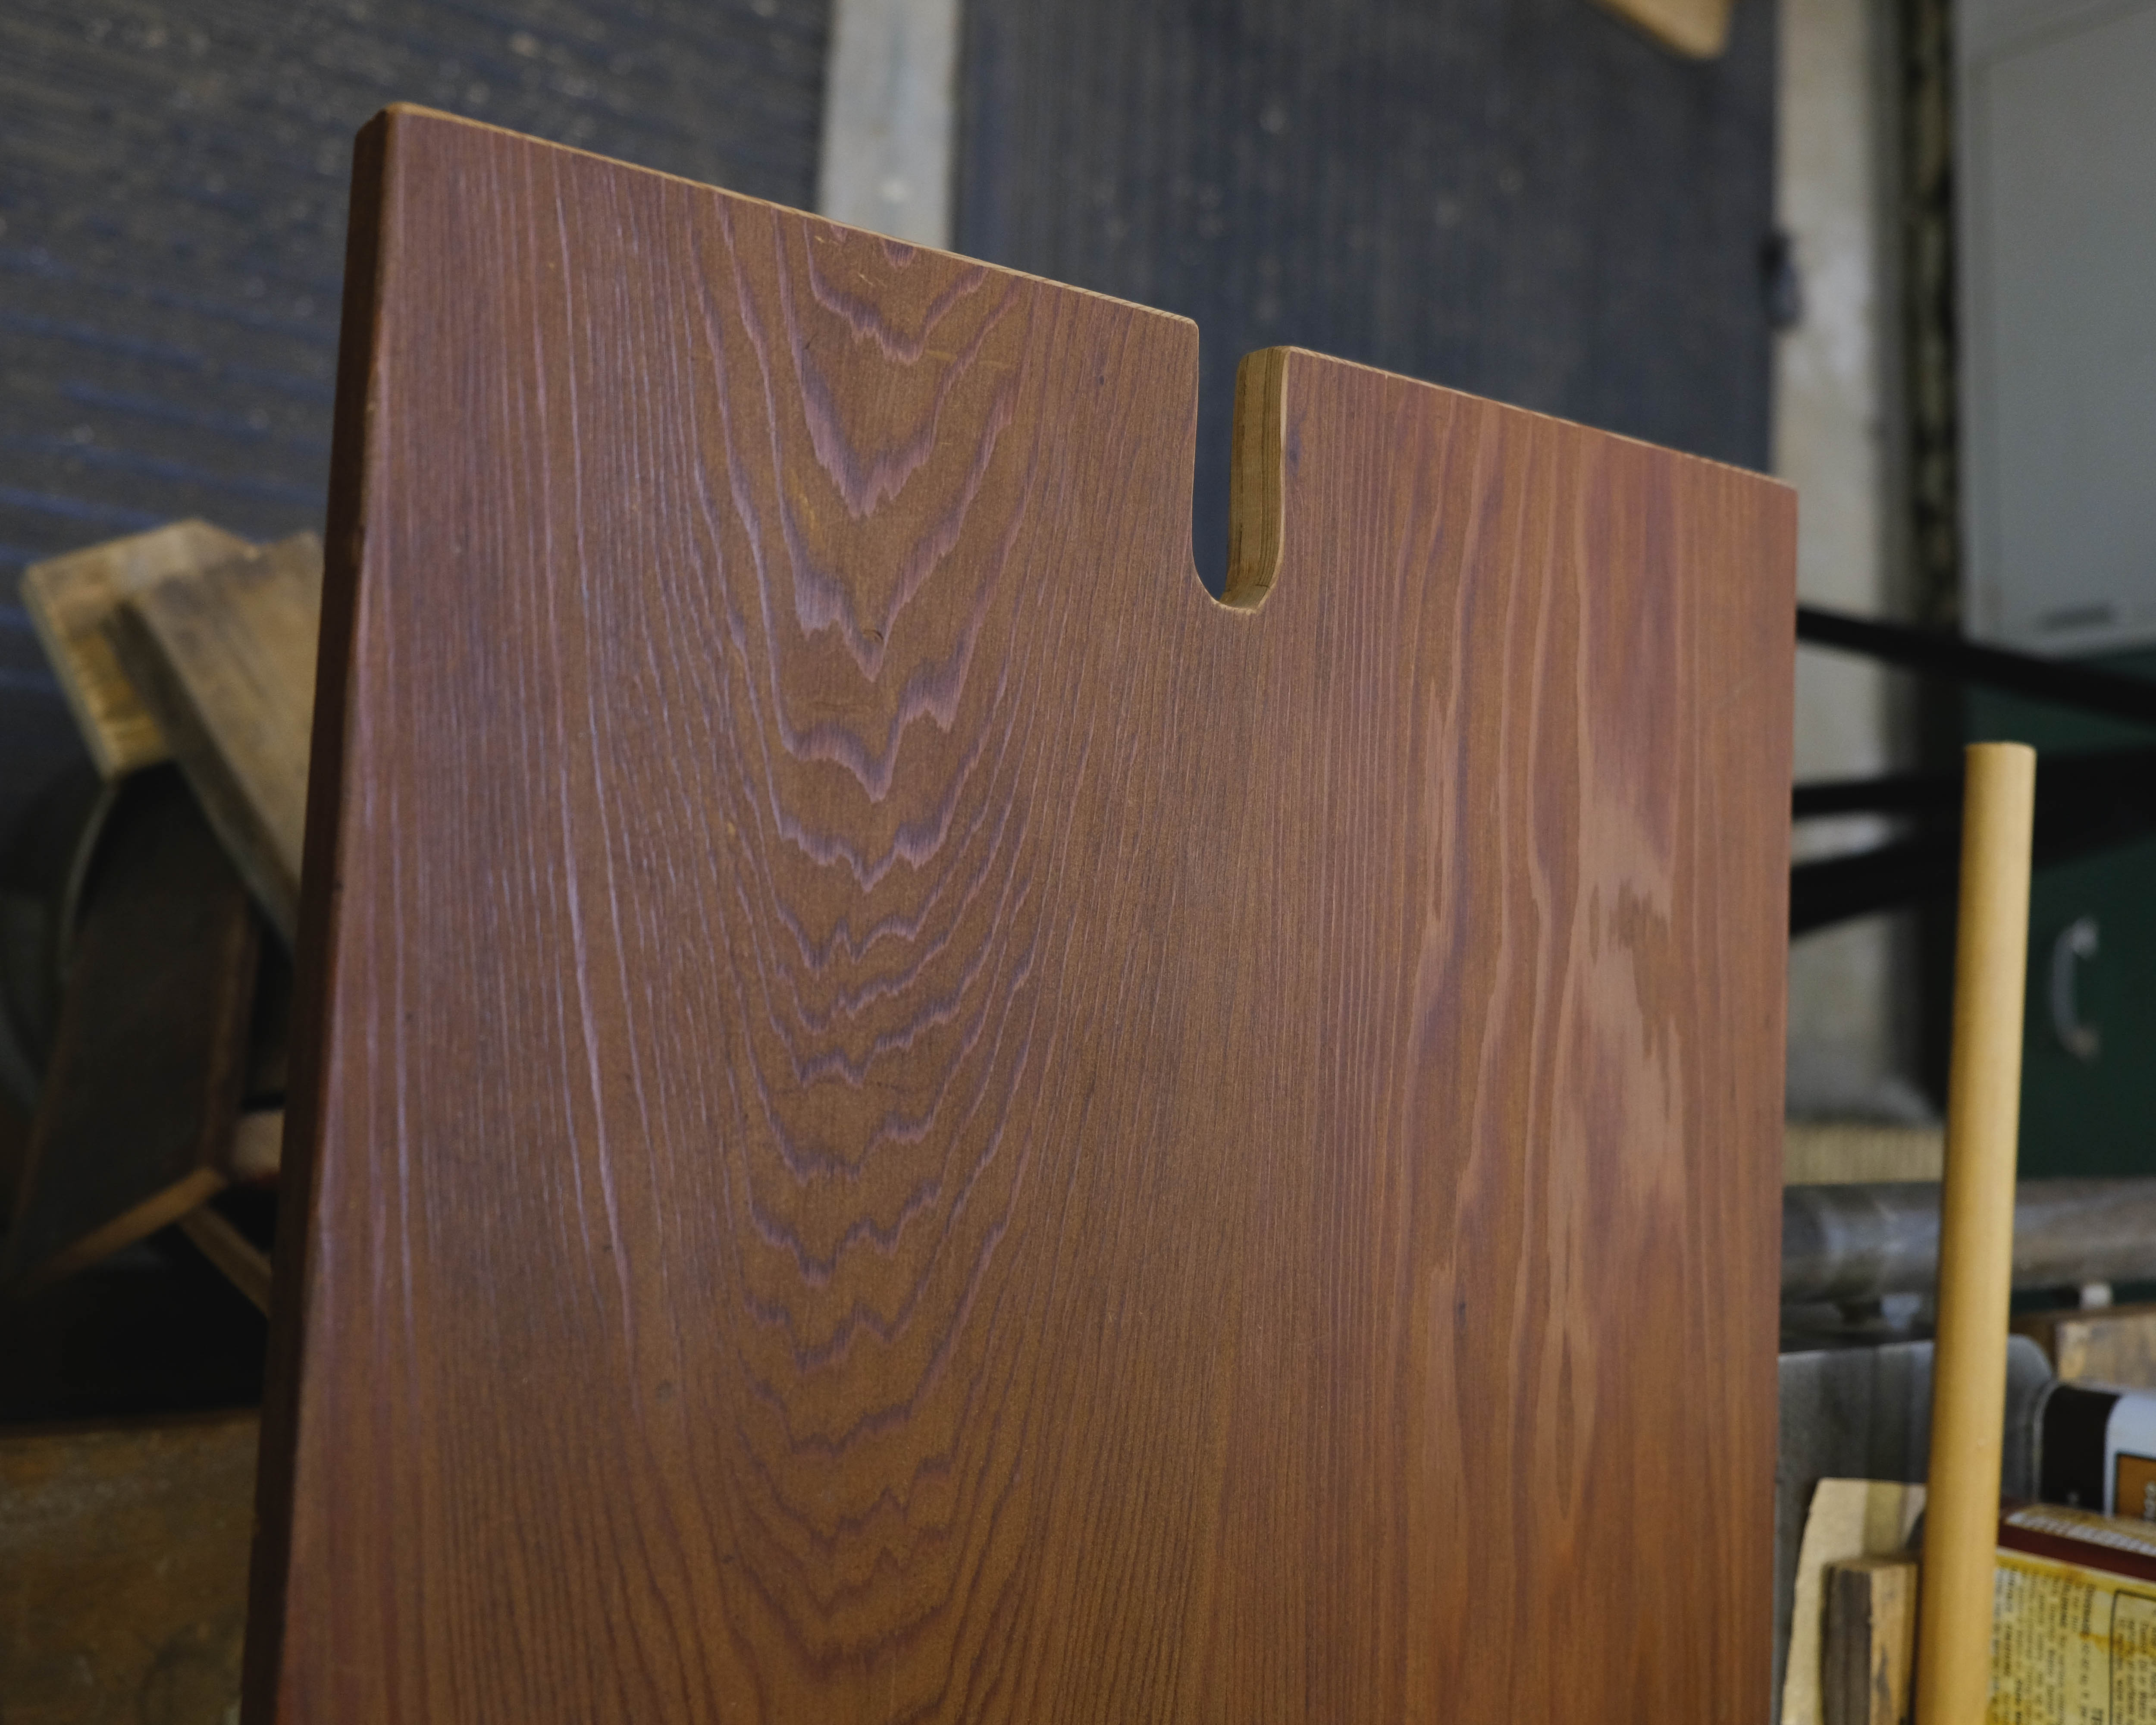
Drilling, sawing, and sanding completed.
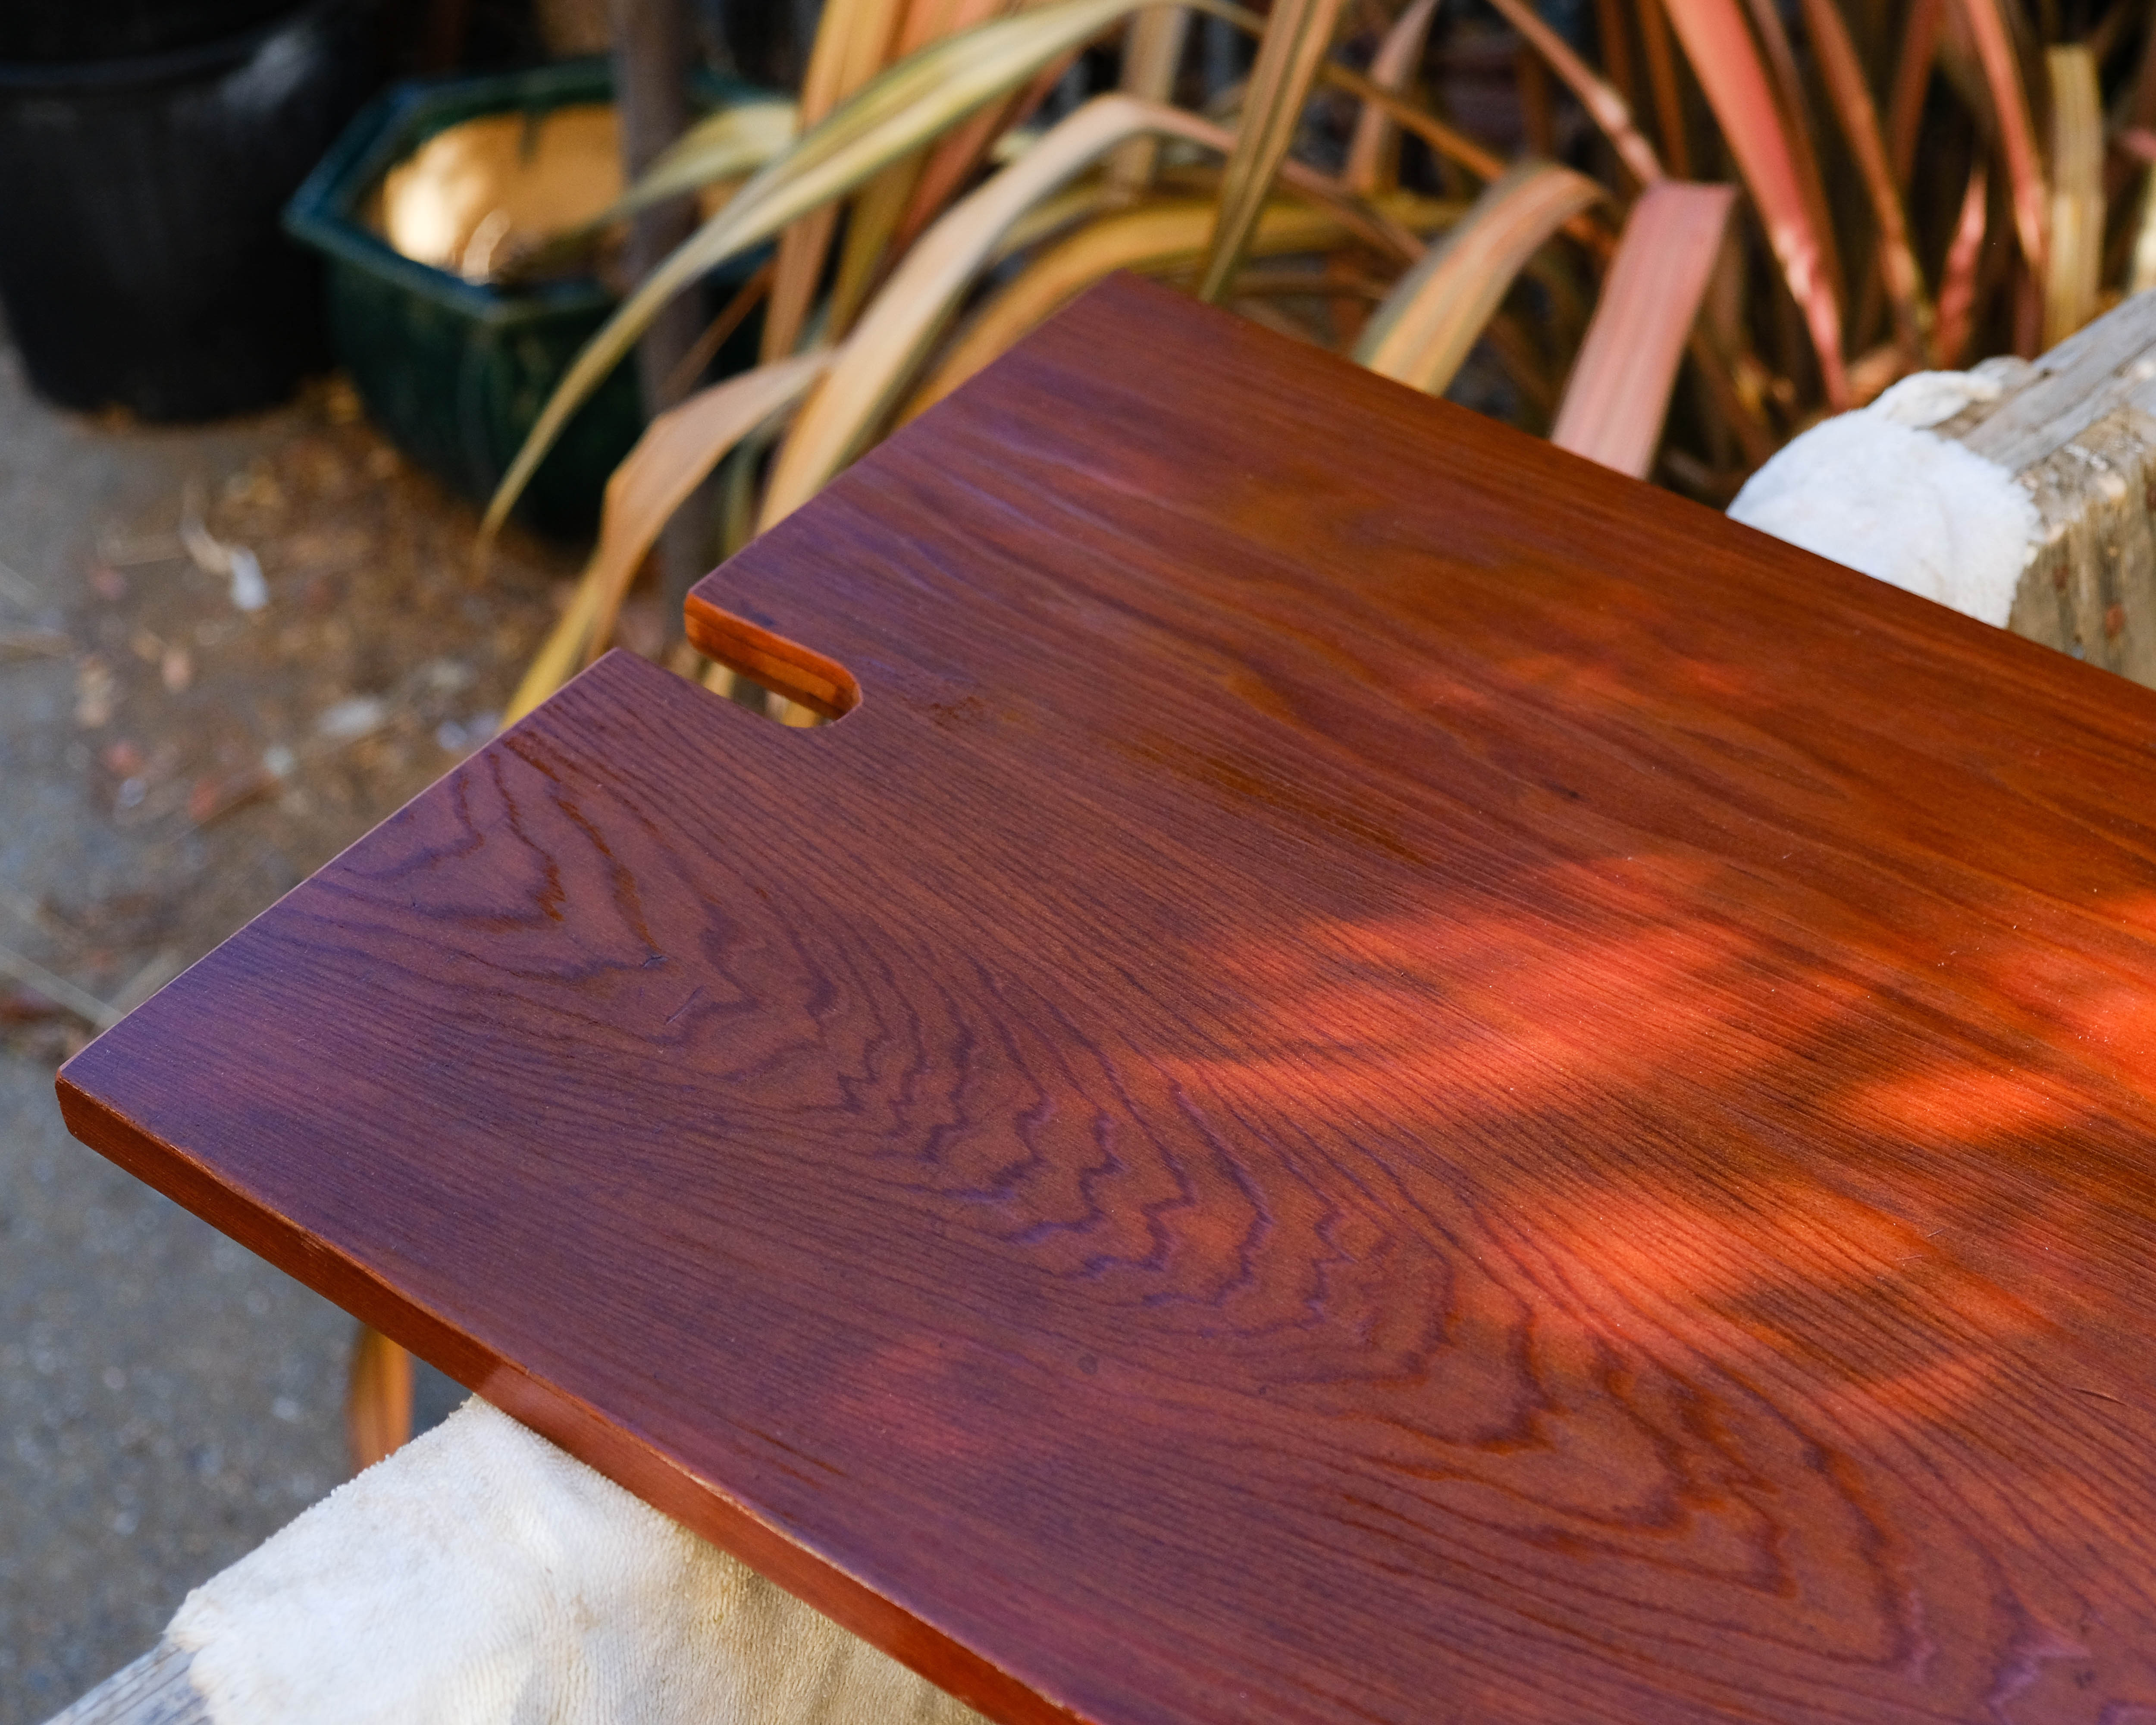
Adding an oil finish makes a huge difference! The color of the redwood and the beautiful grain are much more obvious now. Highly recommended.
4. Conclusion
All told, this was a relatively straightforward and highly rewarding project. I’m lucky that I had access to pro-grade tools and an incredible piece of lumber with a lot of history, but this project would have still been fun and doable without. I know there are many of you out there with closets more than three feet wide that have no need for such a thing, but for the small-closeted among us – here you go. If you feel inspired to take on this project, feel free to ask any questions below and share a photo of your finished product!