Like I said yesterday, button-upgrading is a great way to improve the look and feel of a garment on the cheap. This Club Monaco trench coat is a great piece, but the black plastic buttons were just screaming to be replaced. Although you can get a tailor to do the change for you, the process is not that complex and will save you even more money (along with teaching you a timeless skill).
The method I use here is similar to The Art of Manliness’ great guide on button repair. It essentially comes down to this:
1. Remove the boring old button and threads carefully (be sure to not damage the fabric behind the button).

2. Thread a needle with 2-3 feet of matching thread (or not, if you want the contrast). Double it over and tie a knot on the bottom (the easiest way to do this is to wrap the double thread ends around your pointer finger and twist it off with your thumb – it sounds weird but works like a charm).


3. Make a small “X” stitch to mark the location of your future button. Reuse the old holes if you can. If you’re changing more than one button I recommend starting in the most hidden place on the garment while you get the hang of it. Also, if you’re using a button back (like I am here) this is the time to attach it so that you don’t have to deal with two loose buttons.


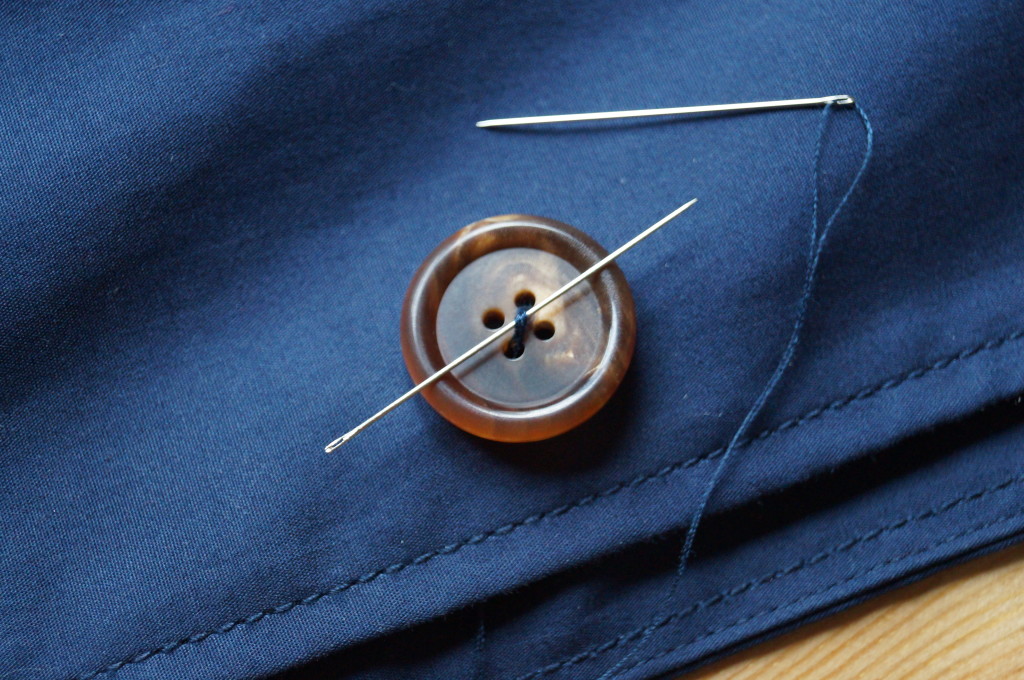
4a. Decide if you will be stitching with a “X” or “II” pattern (I use the first) and begin sewing. I find it easiest to do all stitches in one direction and then switch to the other. I used 4 stitches in each direction for these large buttons but 3 should be plenty for a smaller one, and perhaps even less if the button is not strained during use (like cuff buttons).

4b. Stitch over a second needle to give yourself some slack for later and to hold things in place.

5. Come up through the fabric but bring the thread out the side instead of moving through a button hole. Remove the temporary needle and wrap the thread around the base of the button 6-10 times. This helps secure the button as well as raise it off the fabric for buttoning ease.


6. Thread back through to the base and tie it off however you see fit. I usually thread under the existing loops and then loop through the remaining slack.


7. Repeat until you’ve changed all of the buttons. Marvel at your own handiwork. A lot of people pay big bucks for things like hand-stitched horn buttons and you just did it yourself. Nice job.


&media=https://fromsqualortoballer.com/wp-content/uploads/2013/01/2013.01.06-074-1024x680.jpg)